The Importance of Roofing Maintenance

The Importance of Roofing Maintenance

When a roof is maintained correctly, it can help regulate indoor temperatures, reduce energy consumption, and keep a home dry. A well-maintained roof will also last longer and require fewer repairs than one neglected.

Roofing

Most of the maintenance tasks that need to be done on a roof can be performed by the homeowner with a ladder and some tools, including visual inspections, gutter cleaning, and debris removal. Contact North Port FL Roofing for professional help.

Roof flashing is a metal or other material that seals joints and transitions on your roof, such as chimneys, vents and valleys. These areas tend to be leak-prone and can be a source of major damage if not properly maintained.

During a regular inspection, an expert will look for signs of deterioration on your roof flashing. This can include leaks in the roof, rust or cracking. This is one of the most important parts of a roofing maintenance plan and can help protect your investment in the property and avoid costly repairs later on.

The flashing around openings on the roof, such as chimneys, skylights and vents are also important to check. These are often sealed when the roof is installed but can become vulnerable over time. A professional will ensure that the seals are still intact and that no water is getting in through these areas.

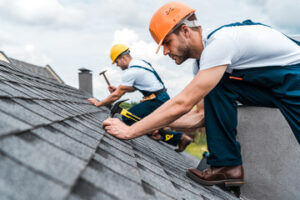
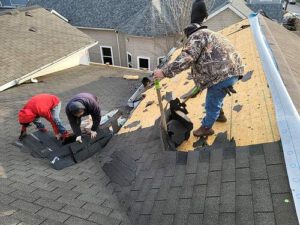
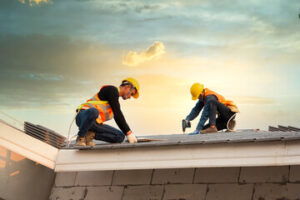
Sloped roofs require regular inspections to check shingles, flashing and gutters for any signs of problems. These issues can often be resolved in the early stages, preventing a major repair bill. A professional will also take the opportunity to clear any debris that has accumulated on the roof and will clean the gutters to ensure that they are working well.

Many manufacturers offer warranty protection for roof products and these may require annual professional roof maintenance to be valid. Having your roof regularly inspected by an expert can prevent problems before they occur and can help you get the most out of your roofing system for years to come.

If you are looking for a roofing contractor to provide regular maintenance and repairs for your commercial or residential property, contact us today to request a quote. We have a team of experts that are highly experienced and trained in providing quality roof maintenance and repairs. We will assess your needs, inspect your roof and provide a written report outlining the recommended services to be performed. We will then schedule a convenient time for our crew to perform these maintenance and repair works. We will keep you updated throughout the process and once we have completed the work, our crew will notify you to arrange payment and pickup of any equipment.

Inspect the Attic

The attic is a critical component to the roof system, but is often neglected when performing roofing maintenance. A comprehensive attic inspection can identify insulation problems, ventilation concerns, moisture and mold growth, structural damages and pest infestations. Prioritizing attic inspections can help homeowners save money on energy bills, maintain a comfortable living environment, prolong the lifespan of their roof and home structure, and ensure the safety and comfort of their family.

During an attic inspection, a professional home inspector will evaluate the condition of the attic’s insulation and look for signs of water intrusion, such as stained or warped roof sheathing and framing. They will also check for vent pipes that protrude through the attic and any stains or drips on eave liners, as these are all potential signs of a leak. They will also look for ice dams in the winter, as these are typically caused by poor attic insulation and ventilation.

If a homeowner is comfortable with accessing their attic, they can perform an inspection themselves. However, it is important to wear proper personal protective equipment, including a hard hat and gloves, before entering the attic. A flashlight is also helpful, as attics are generally poorly lit. It is best to inspect the attic on a rainy day, as this will make it easier to spot signs of moisture penetration.

An attic inspection will also include a thorough assessment of the roof vents and skylights, as they are key to preventing unwanted moisture penetration. Depending on the type of roof, these vents may be neoprene pipe boots, ridge vents, or turbine vents. They should be properly installed and free from any obstructions, such as leaves, dust and debris. In addition, a home owner should check for rust on the vent pipes and scuttle holes, as these can cause serious damage to a roof if not addressed promptly.

Homeowners should also look for signs of pest infestation, such as droppings, rodent tracks and chewed insulation and wiring. These pests can create significant damage to a roof, as they are drawn to the warmth and moisture of attics. An annual attic inspection can help homeowners keep pests out, and prevent the need for expensive repairs or replacements.

Inspect the Gutters

Gutters play an important role in preserving the structural integrity of your home or commercial building and preventing serious water damage. They do this by efficiently diverting rainwater away from the foundation. However, gutter functionality can be impeded by debris accumulation, damage, and harsh weather conditions. This means that you need to inspect and maintain your gutters regularly to ensure that they function properly.

You need to clean your gutters at least twice a year and after major storms to make sure that they are not clogged. Clogged gutters can cause rain or melting snow to overflow and ruin your landscape or exterior siding. In addition, they can allow water to accumulate on the roof, which can lead to a variety of problems including wood rot, mold, and shingle damage. Additionally, if the water is not diverted away from the roof, it can cause leaks inside the house.

During your gutter inspection, look for any dents or holes. You should also look for downspouts that are detached from the gutters or not draining properly. If you notice any of these issues, contact a professional roofing contractor to have them repaired as soon as possible.

When examining your gutters, it is also important to look for any rust or paint peeling. This can indicate that the gutters are corroding. Additionally, you should check for signs of rotting or corrosion on the gutter hangers. These should be repaired as soon as possible to avoid any damage to your gutters and roof.

If you are uncomfortable climbing a ladder or getting on your roof, it is best to hire a roofing or gutter cleaning professional to do the inspection and cleanup for you. This can prevent any serious injuries or property damage caused by falling off the ladder or from being caught in between shingles.

By taking the time to perform routine maintenance on your roof, you can help to protect it from damage and extend its lifespan. This will save you money in the long run as well as prevent minor issues from escalating into significant problems. In addition, it will give you peace of mind knowing that your investment and your family’s safety are protected.

Trim Trees

Trees can damage a roof and the structure of a house if their limbs fall. This is a common problem during storms and high winds. Having trees properly trimmed by an arborist or tree experts can help prevent these issues. An arborist can inspect your home and the surrounding trees, and recommend any steps to support the health and future growth of the trees while prioritizing roof and building safety.

A tree that is growing too close to the house can also impact the gutter system. This is because the branches can clog the gutters and cause water to back up into the house or the downspouts. This can lead to a number of problems, such as roof rot and mold growth. Having the branches of the trees trimmed can reduce the risk of this occurring and keep the gutters clear.

The regular trimming of the trees can also promote the health and beauty of the trees. It is recommended that you have all tree limbs trimmed that overhang your house. This will reduce the risk of limbs falling during storms and other adverse weather conditions. It will also prevent the limbs from touching or abrading the shingles, which can cause them to break and damage the roof.

Another benefit of this maintenance is to prevent the buildup of debris, such as twigs and leaves, around the eaves of your house. This debris can also clog the gutters, causing water to flow back up into the house during storms. By removing these branches, you can improve the efficiency of your gutters and eliminate the need to clean them regularly.

In addition, trimming the trees can also prevent damage to sidewalks, driveways, and the foundations of buildings from their roots. It can also ensure that utility lines are not in contact with any branches that could potentially cause damage during a power outage. Finally, regular pruning can help maintain the shape of the tree and promote airflow throughout the crown. This can reduce the risk of insect infestation and disease, while also increasing the overall health and growth of the tree.

The Importance of Roof Repair

The Importance of Roof Repair

Your roof protects everything you value inside your home. But the integrity of any roof is under constant assault from sun, wind, rain, ice, and other environmental factors.

Roof Repair

If you discover water stains or other telltale signs, get into your attic and start looking around (be careful!). Take lots of high-res pictures and try to be systematic.

A damaged shingle can lead to leaks, which can result in untold damage to your ceiling and other parts of your home. Whether the damage was caused by a recent storm or by general wear and tear, repairing it is essential to protecting your roof and your home.

The first thing to do is assess the extent of the damage and determine whether it’s a job for you or a professional. If you decide to go it alone, make sure you have all the right gear, including a sturdy ladder, safety harness, gloves, protective eyewear, and non-slip footwear. Also, get a roofing spade and a utility knife for easily lifting and cutting shingles. Lastly, you’ll need a hammer with a claw and roofing nails. A caulking gun is useful for applying the necessary sealant to secure the shingles and prevent leaks.

If a single shingle is damaged, you might be able to replace it with a piece cut from a nearby shingle that’s the same size. Otherwise, you’ll have to purchase a bundle of three-tab shingles at a home center or lumberyard and find a close match for the pattern on your roof.

Once you have the new shingles, start at the top of your roof and carefully pry up the course of shingles above the damaged one, loosening their nails and exposing the nails that hold it in place. Then, remove the nail from the shingle you wish to replace and pull it free. Next, remove the shingle above it and position the replacement shingle in its place. Use the shingle spade and utility knife to pry up the tabs of the shingle beneath it, then cut off any bits of the old shingle that stick up above it.

When you’ve finished replacing all the damaged shingles, apply roofing cement to the edges and any gaps in order to protect your roof from water leaks. Then, check your gutters for an accumulation of colored granules that can be used to camouflage the repair work.

If a large section of your roof’s shingles are missing, you’ll have to replace the entire row. This is a much more involved project, and you’ll probably want to call in a professional.

Flashing

A roofing system’s flashing is crucial to keeping water out of your home. It’s made from thin pieces of impervious material, usually galvanized steel or aluminum, and installed at any roof intersection or joint. Flashing protects the vulnerable areas of a roof from leaking water that could otherwise damage shingles, lead to structural problems or cause mold.

It’s also important to note that flashing can be either exposed or concealed. The most common type of flashing is metal sheeting used at roof intersections and projections, such as vent pipes, chimneys and skylights. This is typically found on shingle roofs, although other materials are also used, such as copper or lead. Concealed flashing is typically done by forming a metal gutter at the wall, or by cutting out part of the stucco or brick wall and laying down flashing.

When a roof’s flashing is damaged, it can allow water to penetrate the surface of the shingles and into the interior of a building. There are a variety of warning signs to look out for that may indicate it’s time to replace flashing, such as discoloration around the areas where the flashing is installed due to trapped moisture, or a noticeable increase in exterior noise due to cracks and gaps in the flashing.

During the hot, humid summer months in Massachusetts, flashing can be particularly susceptible to damage because of dramatic changes in temperature. These extreme temperatures cause the flashing to expand and contract, which can result in it becoming warped and causing leaks at the points where it’s attached to a wall or other structure.

A professional roofer will be able to identify and repair any flashing issues before they become a serious problem. They’ll inspect the flashing and determine if it’s damaged or needs to be replaced, as well as check for any missing sections. If there are any holes or gaps, a skilled roofer can install replacement flashing quickly and easily.

If you notice any of these issues with your roof’s flashing, schedule an inspection immediately with a local roofing company like Lyons Roofing. Regular roof maintenance is essential to preventing costly repairs in the future, so it’s worth investing in annual maintenance and inspections of all parts of your roofing system, including the flashing.

Sagging

Roof sagging is a common sign that the structure needs to be reinforced or replaced. Sagging can cause structural damage to the house and, in extreme cases, may even cause parts of the roof to cave in. This is a serious problem that needs to be addressed as soon as possible in order to prevent further damage and potential injury to the residents of the home.

Sagging can be caused by a variety of things, including excessive weight, which is often caused by heavy snow or multiple layers of shingles. It can also be caused by structural defects in the rafters or trusses, or by design flaws that leave the roof unable to support its own weight.

In some cases, sagging can be corrected by adding supports or braces to the structure. This can be done by a professional roofer, and will usually cost less than replacing the entire roof. However, if the sagging is due to damaged or rotting rafters or trusses, replacement may be the only option.

The first step in determining the cause of a sagging roof is to inspect the structure. Take a look at the roof from the street and, if possible, go inside your attic and walk around with a flashlight. This will give you a better idea of the condition of the rafters or trusses, and you can look for signs of damage like cracks, rot, or broken pieces.

If the sagging is caused by a large amount of weight, it may be necessary to install additional support columns. These can be added to the attic or crawl space, and can help distribute the weight evenly across the entire roof. In addition, the sagging can be prevented by regularly clearing the roof of heavy snowfall, and keeping the attic well-insulated to prevent moisture buildup.

There is no set standard for how much sagging is acceptable, and any major sagging should be addressed immediately. A professional roofer will be able to inspect the condition of the structure and recommend the best course of action for repair.

Leaks

Your roof shields your home from wind, rain, sleet, and snow for decades. But it will eventually degrade, often through no fault of its own. An old or damaged shingle, poor flashing, or the onset of a leak can all lead to water intrusion and structural damage. The best way to prevent these issues is to maintain your roof and repair it promptly when problems arise.

Leaks often begin as a single wet spot on the ceiling and spread quickly. It’s critical to contain the leaks to limit the extent of the water damage, and this can be done by placing a bucket or other container under the affected area. It’s also important to contact your roofing contractor as soon as possible. Letting the issue go unattended can void your roof warranty and may result in more expensive repairs than if the problem is addressed as soon as it occurs.

The most common cause of roof leaks is due to flashing problems. Flashing is a metal strip that protects the valleys of your roof and any areas where the roof meets vertical surfaces, such as walls or dormers. Leaks can occur in these areas if the flashing is not installed properly or the flashing has become dislodged or corroded. The rubber seals on pipe boots can also degrade, allowing water to seep through and causing damage.

Another common cause of roof leaks is from improper ventilation. When water vapor in the attic can’t escape, it will condensate and rot the wood trusses and roof deck. This can cause a wide range of issues, from mildew and mold to fire hazards if the water reaches electrical wiring.

A well-ventilated attic is also crucial to preventing leaks, and the good news is that it’s often an inexpensive fix. This can be accomplished by blocking air leaks in the attic, increasing insulation, or having a roofer install a self-adhesive membrane. Leaks can also be caused by so-called ice dams, which are the result of warm air escaping from the attic and hitting the cold roof surface. This causes a freeze-thaw cycle that leads to the formation of ice at the eaves, which then leaks into the house.

Radiant Barriers – How to Install Them Properly

Radiant Barriers – How to Install Them Properly

Radiant barriers are a great addition to your home’s attic insulation. However, you must ensure they’re installed properly for the best results .During installation, consider any obstacles or features in your attic, such as vents, chimneys, and electrical wiring. Also, check the radiant barrier regularly for signs of sagging or gaps.

The double-sided reflectiveness of radiant barriers makes them a cost-effective energy-saving option for home insulation. They can reduce summer cooling costs by reflecting heat radiation, which prevents it from passing through the air to other surfaces. Radiant barriers are also very durable, making them a good investment for homeowners. However, it’s important to do your research before purchasing any products. There are many options on the market, and prices vary widely. If you can find a good deal, you can save even more money. Visit https://www.ultimateradiantbarrier.com/ to learn more.

radiant barrier

While there are many ways to use a radiant barrier in a home, some types are better than others. It’s best to purchase a product that has undergone current ASTM C1313 testing and should be labeled with this information. That will ensure that the radiant barrier will perform as intended.

It is important to know that radiant barriers do not reduce heat transfer through conduction, the process by which thermal insulation materials minimize heating and cooling loss. Instead, they are designed to reflect radiant energy (heat) away from the attic floor and do not reduce convective heat transfer.

That is why radiant barriers are often recommended for homes with vaulted ceilings, which can be challenging to insulate with conventional insulation. A radiant barrier will make the attic floor cooler and can be used with traditional insulation to reduce a home’s energy costs.

Several types of radiant barriers are available, including foil-backed sheathing installed in new construction homes. The sheathing can be draped over rafters, or it can be applied to plywood or OSB sheathing. Installing radiant barriers by spraying them on the attic floor is also possible. While the spray-on products are cheaper, they do not offer the same level of protection as the other types of radiant barriers.

A radiant barrier’s reflective surface redirects heat away from the attic and roof decking, preventing energy loss. This energy-efficient feature saves homeowners money on heating and cooling costs. It also increases a home’s resale value.

Unlike conventional insulation, radiant barriers don’t require convection and condensation to transfer heat. They use radiation to prevent heat transfer, much like a windshield sunshade. That prevents the heat flow that usually carries warm air from the attic into the living space and causes high utility bills.

Radiant barriers are easy to install, and many companies offer DIY kits. However, the installation process requires a ladder and the right tools. Before attempting the job, consult your local building code requirements to ensure you have everything you need to get the job done right. Hiring a professional is recommended to avoid injury and ensure the safety of those involved.

Before you buy a radiant barrier:

  1. Compare the products on the market to find the best deal.
  2. Look for a warranty, and ask for current ASTM test results.
  3. Be wary of companies that claim their product is better than the competition because they may be misleading you with too-good-to-be-true statistics.

Radiant barriers keep homes cool during summer but are less effective during winter. They can reduce the amount of radiant heat that reaches the attic from outside, but they’re unable to stop heat transfer from inside the house to the attic. This product type is best used with other energy-saving measures, such as a new roof and insulation.

Radiant barriers are foil insulation with high reflectivity and low emissivity. They are usually laminated on either side of paper or plastic and come in sheets (sarking) or concertina-type batts. They can be combined with many types of thermal insulation as their facing material. The higher the reflective properties of a radiant barrier, the more heat it will reflect. To ensure you get the best product, look for a radiant barrier with a reflectivity rating of 95-97% and an emissivity of 3-5%.

Radiation barriers are typically built into new homes by having the contractors drape a foil-faced sheathing over joists and trusses during construction. However, they can also be installed in an existing home with an open attic.

When installing a radiant barrier, following the manufacturer’s instructions is important. Hiring a professional with the proper safety gear and who knows how to install the fence correctly is also a good idea. That will ensure that the job is done efficiently and safely.

Once the radiant barrier is installed, it’s essential to inspect it regularly for signs of damage or deterioration. If you notice any problems, it’s best to repair them immediately to prevent energy loss.

A radiant barrier will keep your home cooler and save you money on energy bills. It’s a smart investment for any homeowner but especially useful in warmer climates. The precise savings you will see depend on several factors, including the size of your attic and how well the air ducts are insulated. However, it can catch up to 16% savings in cooling costs with a radiant barrier alone.

Radiant barriers are made of aluminum foil laminated to a substrate material. The materials can range from kraft paper to plastic films, cardboard, or oriented strand board. Some products are also fiber-reinforced for added strength and durability. They can be combined with many types of thermal insulation materials and act as the insulation facing material.

The purpose of radiant barriers is to reduce the amount of heat that transfers in and out of buildings. They do this by reflecting radiant heat, unlike traditional insulation that absorbs it. That is especially useful in warm climates with much higher energy costs during the summer.

Typically, a radiant barrier is installed in the attic of new homes. Contractors drape the rolled-foil product over the attic floor before installing the roof sheathing and then staple it to the rafters. That helps minimize dust accumulation on the reflective surface. Ideally, the product should have an air gap on at least one side to keep it from absorbing radiant heat and converting it into conductive heat.

In addition to reducing cooling costs, radiant barriers can help with winter heating by reflecting radiated heat into the home. They can also prevent moisture transfer in and out of the building. However, radiant barriers should be combined with traditional insulation to achieve maximum benefits.

The lifespan of radiant barriers depends on the conditions in which they are installed and how often they are inspected. They can be expected to last for decades, but regular inspections should be performed to identify potential problems before they become serious. For example, a radiant barrier might begin to break down due to extreme temperatures or moisture.

The use of radiant barriers in homes is one of the most innovative energy-saving technologies available to homeowners. It’s a powerful technology that can significantly reduce heat transfer in and out of your home. However, certain vulnerabilities and issues with radiant barriers are important to be aware of.

A radiant barrier works by reflecting thermal radiation, the energy that makes things hot without contact. That is the same type of heat that you feel on your skin when you walk out on a sunny day and step under a shade tree. Radiant barriers absorb and reflect this energy, which helps to cool the house.

They also help to reduce cooling costs in hot climates. That is because they reduce the heat transferred into the attic, where air conditioning ducts are located. They can sometimes lower your cooling bills by 5% to 25%.

In addition to cooling, radiant barriers can help reduce heating costs in winter. That is because they can reflect the radiant heat from heaters and furnaces into living spaces. However, they are not as effective in lowering heat loss as other types of insulation.

Radiant barriers can be installed in attics in several configurations. The most common is a sheet-type material that is placed directly on the attic floor with its reflective side facing up. Another option is to staple the radiant barrier now to the attic joists or rafter framing. Some manufacturers also sell radiant barrier “chips” blown into the attic, which function as multi-layer, concertina-type products with many trapped air pockets.

How To Select A Roof Replacement Company

How To Select A Roof Replacement Company

There are several factors to consider when selecting a company to replace your roof. The average cost is $7500 for roof replacement in the country. This can vary, however, depending on the size of your house and the materials you choose. It would be best if you also determined whether your insurance policy covers the cost of roof replacement. Read the following tips to ensure your investment is worthwhile. Then, get in touch with the company and ask them about the details of their work.

roof replacement

Depending on the type of roofing material you have installed, your roof may be as old as 20 years. Many older homes have tar or roof cement for their flashing. Changing your flashing system to a metal system can improve the longevity of your roof. If you notice your roof drooping or sagging, it’s time to replace it. It may indicate that you’ve trapped moisture in your home. You may also notice rotting boards or other signs of sagging.

One of the largest expenses for a homeowner is replacing their roof. While replacing the roof doesn’t provide immediate home improvements, it is an investment in your home’s value. New roofs last anywhere from 30 to 100 years, depending on the type and materials used. You’ll be able to recover the costs of the tear-off and replacement of a roof when you decide to sell your home in the future. To avoid any surprises or additional costs, it’s important to gather information about the cost of roof replacement.

Some signs that your roof needs replacement include granule loss and moss on the roof. Another sign to consider is water damage to the ceiling. Shingles that are missing, curled, or cracked are a sign that you need to replace your roof. In addition, you can check for light coming through your roof. If you notice that the granules are missing, you’ll likely need to replace your roof. A roof that’s missing granules will allow water to penetrate the home and cause leaks.

A new roof replaces your existing roof and costs between $4.35 and $11 per square foot. This price includes the removal of your old roof and disposal of the waste. Most roofs last between 20 and 50 years. Roofing costs are highly dependent on the region in which you live. There are several factors to consider when choosing a roof replacement company. The cost per square foot depends on several factors, including the materials used. The cost per square foot varies greatly, but you should keep in mind that the price is typically divided into three parts – 40 percent materials and 60 percent labor.

A new roof requires careful attention from your roofing contractor. The job is important, and the roofing contractor you choose is responsible for each step. There are a few key steps that homeowners can do to make sure their roof replacement goes smoothly. You should have a clear idea of which type of roofing material is right for your home and how the process will work. You should also know how to choose the best roofing materials for your home, and the basics of an accurate estimate.

The next step in roofing is to determine the type of replacement you need. A re-roofing, for example, means putting new shingles on top of the old ones. However, this may not last as long as a full roof replacement. Moreover, you cannot see underneath the shingles what’s under the shingles. If your roof has significant damage, you should consider a full roof replacement. The cost is generally less than half of the cost of roof replacement.

Once you’ve decided on the type of roof replacement, the next step is preparing for the project. You can prepare yourself for the day by ensuring that the contractor is fully equipped with the right materials and tools. The process is not difficult if you know what to expect. A quality roof replacement company will be thorough and courteous throughout. You should also make sure that the contractor you choose is insured and has the best materials warranty. Then, the project can begin!

Once you’ve determined that roof replacement is the best option, there are several factors to consider. One of the most important decisions is what kind of material to use. While asphalt roofing shingles are relatively inexpensive, their lifespan is limited. In general, it’s better to go for metal or concrete roofing materials. Moreover, wooden shingles have a classic look, provide excellent insulation, and are customizable. A professional roof inspection can determine the most appropriate materials for your roof replacement.

You can also visit our other websites and post your article.

Super Street Car PerformanceFEDERACAO TRIATLO – COMPETITIVE DANCE CLASSESCT Miller Vine YardsWillys Off Road SupplyThe Rhumb Line Green PortMy Kitchen Rules UKPralognan-VanoiseScottish Dance Videos,Green Ville Hotels TodayConfluence Creative Arts CenterPlatu25The Vine Yard By Mellon,Curious Oyster SeminarsDrift Wood Lodge OnlineThe Persimmon Tree StoreTHE JAVA TREE CAFEElsberry Tours and AdventuresTHE RAYBAN OUTLETITAddiction to Video GamesET TEAMMoab 4×4 PartsHoliday Shores MotelMarcreynoldssail MakerYorke Peninsula AccommodationTemenos Golf Club Superb 18-hole CourseWomen’s Health GuideBest-Singapore-Travel-GuideSail Series PromotionsCharm and Bead CollectiblesArizona Solar SocietyAutomotive-Air-Conditioning-Vehicle-PartsSMART RACINGMikes Austin Tree ServiceColori Kitchen To GoAstoria InteriorsSamsolakyanMOUNTAIN VIEW SOLARDISABILITY RAMPSNew Mexico Beagle RescueRay Caron For Maine

How to Avoid Emergency HVAC Service

emergency HVAC service

If your AC unit fails to respond to the settings you have set, you may need to call emergency HVAC service. If your unit is not responding to your thermostat, you could find yourself without heat for hours. To prevent this from happening, follow these tips. If your air conditioner is not working, you must check its settings and see if they have been set to auto. Otherwise, call HVAC services to diagnose the problem and get it fixed before it gets worse.

First, make sure the electrical panel switch on your HVAC system is switched OFF. If the unit still doesn’t show any signs of life, the power panel has tripped, cutting off the supply to your HVAC system. Flip the switch back to ON to restore power to the HVAC system. Then, wait for a few minutes for the power to come on. Repeat this process if the system continues to run. Make sure to call an emergency HVAC service if you can’t get it fixed yourself.

Before hiring an emergency HVAC service company, make sure they are fully insured and bonded. You can also ask if they conduct drug tests and background checks on their employees. Make sure they give you an upfront estimate, and look for a satisfaction guarantee. Finally, if you don’t know how to troubleshoot a broken heating system on your own, it can be dangerous to wait until it breaks down. If you wait until the problem is too late, you might end up paying more money than you should.

The best way to avoid emergency HVAC service is to have routine maintenance performed on your unit. It will help you stay on top of minor repairs and give you a better idea of the overall condition of your unit. However, emergencies happen all the time and you should be prepared to call for emergency HVAC service as soon as you notice a problem. If your HVAC unit is not working properly, it can cause serious damage to your home. You can be forced to leave your house or suffer from discomfort in the middle of the night.

There are several symptoms that indicate the need for emergency HVAC service. A rotten egg-like smell while your gas furnace is operating is a sign of a gas leak and should be immediately handled by a professional. The yellow pilot light in your gas furnace indicates higher levels of carbon monoxide. It is also important to contact your local gas company. In addition to a rotten egg-like smell, a broken gas valve will also cause dangerous carbon monoxide levels in your home.

Frequent sounds are also signs of a problem with the equipment. If the noises are accompanied by screeching or whistling, the problem could be serious. The technician should shut off the unit immediately to prevent further damage. Often, these sounds are caused by an improperly installed fan belt, high pressure in a compressor, or a damaged blower motor. Regardless of the cause, emergency HVAC service will help you avoid a major inconvenience.

Electrical problems may require an expert. Many air conditioning and heating systems have a plethora of wires running throughout, and trying to fix them yourself can cause a bigger headache than you initially imagined. You may also risk a fire or electrocution if you attempt to fix an electrical problem by yourself. A burned out wire or overloaded capacitor could cause an emergency HVAC repair. A professional will be able to diagnose the problem and get your heating and cooling system up and running quickly.

If you notice the symptoms of an AC emergency, it’s time to call an AC repair specialist. Although most repairs are not emergencies, they require immediate repair if your system has been broken for more than a few weeks. Signs that your air conditioner isn’t working properly can range from a strange odor to a clicking thermostat. Whatever the cause of your emergency AC issue, Edison Heating & Cooling can help you fix your AC problem in no time.

If your heating or cooling system isn’t working, you’ll need to make sure your home’s temperature is comfortable enough to stay cool. A malfunctioning cooling system or heating system is a major source of stress, especially for elderly people. They are especially sensitive to temperature fluctuations. It can be stressful to be in the middle of summer or a freezing cold winter, so having air conditioning or heating unit repair service quickly will make things better.