
If left unattended, the oxidation of gel coat can lead to water damage to fiberglass and metal components that can corrode. This can cost you a lot of money and your boat’s safety.
Fortunately, fixing gelcoat scratches and gouges isn’t a big deal, provided you have the right mindset, tools, and materials.
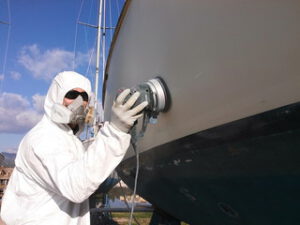
Scratches in gelcoat are relatively easy to repair if they don’t go through to the fiberglass. Depending on the color and depth of the scratch, wet sanding and buffing may restore it to its original shine. Gelcoat repairs are easy enough to do yourself at home, but be sure to follow all the safety instructions that come with your tools and materials, especially when working with the noxious gelcoat catalyst. A respirator and disposable gloves are essential.
Begin by cleaning the area around the scratches with acetone to remove any loose grit and prep the surface for the repairs. Mask off any areas that you don’t want to get paint on (like the windshield or any adjacent surfaces that can’t be wet-sanded) or use a plastic sheet to protect them from spray. Then sand the entire taped area with 180-grit paper to roughen the surface and create a shallow bevel for bonding. Clean the area again with acetone.
Once the area is prepared and dry, apply a small amount of gelcoat paste to the scratch. A few thin coats are sufficient to fill it. If your gelcoat repair kit has a plastic spreader or putty knife, work it into the scratch to smooth out the surface. Make sure to leave a little extra paste on the edge of the scratch, since gelcoat shrinks as it cures.
Some kits include a release film to cover the area after applying the gelcoat, but if yours doesn’t, a piece of a plastic kitchen zipper bag should do the trick. Be sure the seal is airtight to prevent gelcoat from escaping during the curing process.
If you’re working with a color other than white, it’s helpful to mix some pigment in the gelcoat paste to match your boat’s color. Some kits also include clear gelcoat that you can apply to a damaged area for a quick blend and polish. But if your scratch is true-color red, blue, green, or black, it’s better to let a professional do the job for a more durable and attractive finish.
Gouges
Unlike scratches, gouges are larger holes that disrupt the smooth surface of the gel coat. They can be caused by impact or even just rubbing against something rough on the RV’s fiberglass structure. They can be repaired by sanding and buffing the area until it is smooth and looks like new again. However, fixing gouges in a vertical surface poses some unique challenges and may be better left to the professionals.
Generally, a gelcoat repair kit is the best option for a quick and easy DIY repair. They are available at marine supply stores, home improvement centers, and paint supply stores. Make sure you have a gelcoat matching color and a mixing stick for your kit to ensure you’re getting an ideal match to the existing gel coat. Wear gloves, a face mask, and a dust mask when working with these materials to avoid breathing in the noxious fumes.
After you have a good color match, it’s time to apply the gelcoat to the affected area. Make sure you follow the specific instructions for your gelcoat. It is important to mix the gelcoat base and catalyst in the correct ratio, as too little or too much prevents it from curing properly. You can spray the gelcoat or use a brush, but the spray application method is preferred as it allows you to create a more uniform coat and ensures that it’s applied to the proper thickness.
When you’re applying your gel coat, it’s important to work slowly and carefully to get the best results. Use a small bit of clear activator to thin the base for spraying, and make sure you’re applying it at least 1/16th of an inch thicker than the indentation you’re filling in. Allow the gelcoat to cure completely before you attempt to sand or buff it.
Once your RV has its beautiful, shiny gel coat back, don’t forget to protect it with a high-quality wax. This will help keep it protected from dirt, road salt, grime, and the brutal sun. With a couple of coats each season, you can enjoy your RV’s new-RV shine for years to come!
Cracks
When the gel coat becomes damaged, cracks can develop. The cracks can appear in a variety of ways. Some are hairline, and others may be radial or star-shaped. If they are left unattended, the cracks can get larger and cause the fiberglass structure to delaminate or blister. Cracks are caused by a combination of factors, including environmental stress and exposure to the sun’s UV rays. A professional will repair the cracks so that they are even and smooth and can match the color of the gel coat surrounding them.
Gelcoat crack repair is a complex job that should be done by an experienced technician. It involves cleaning the cracked area, wet sanding with medium-grit sandpaper, filling the crack with pigmented gelcoat paste, wet sanding again for an aesthetically pleasing finish, and polishing and waxing the repaired area. It is possible to do a crack repair yourself, but it is much better to take your boat to a professional service for the best results.
If you have deep scratches in your gel coat, it is important to sand them down until the fiberglass beneath the scratch is exposed. Then you can use a gouge-out tool, such as a miniature grinder or the sharp point of a can opener, to widen the scratches until they are large enough to be filled with gel coat paste. If you leave these types of nicks unattended, water can penetrate the fiberglass and cause the boat to delaminate.
The first step in gel coat restoration is to remove the oxidation that makes your boat look dull and old. This is a tedious job that requires a rotary buffer with a heavy cutting wool pad and a high-abrasive cutting compound. Once the oxidation is gone, you can polish the gel coat with a finer compound to bring out that beautiful shine.
Structural Damage
If the gelcoat is badly damaged, it should be repaired as soon as possible to prevent water from seeping through and damaging the fiberglass structure of the boat or yacht and rusting metal components. Leaving damaged gelcoat unattended is sure to cause further damage and potentially even more expensive repairs.
It is not difficult to repair gelcoat dings and scratches at home, given the right mindset, tools, and materials. However, making repairs to vertical surfaces (like a boat’s hull) presents some unique challenges. To start with, it is important to protect yourself from dust and noxious fumes by wearing a mask and disposable gloves. It is also critical to follow all safety instructions for the tools and chemicals involved, as well as read and understand all of the manufacturer’s warnings.
Once you have your colors matched and catalyst mixed in with the final batch of gel coat, apply the gelcoat to the area to be repaired. It is best to use a high-quality squeegee with a good curve to ensure an even application. If you have a large area to cover, it may be necessary to make multiple applications. When the gelcoat is fully cured, sand it smooth (wet sanding works very well with gelcoat) and then buff it out with rubbing compound. If desired, a coat of wax can be applied.
Before applying any gelcoat to a structural surface, it is a good idea to take a close look at the area and determine what caused the cracks or gouges. While most cracks and chips are due to impacts with hard objects (winch handles, downrigger weights, 15-pound lobsters), there may be a deeper problem that needs to be addressed. For example, if the cracks radiate from the base of load-bearing equipment like cleats or stanchion, this could indicate that the load is being unevenly distributed. This is a good time to consider shifting the load to other areas of the vessel or using larger equipment.
Stain removal is a crucial step in the gelcoat repair process. There are many products available on the market that are specifically formulated for marine use. These include black streak removers, rust stain removers, exhaust stain removers, mold stain removers, and bird dropping stain removers. Some of these products are designed to be used as a primer before the final topcoat, while others can be used as a stand-alone product.